Getting started
In this tutorial, you set up Sablier as scale-to-zero middleware behind a reverse proxy. You start from a plain service, place Sablier in front of it, and watch the service stop when it is idle and start again when a request arrives.
If Sablier is new to you, read how Sablier works for a short overview. You also need Sablier installed; see install Sablier.
    flowchart LR
    subgraph proxies [Reverse proxy plugins]
        direction TB
        traefik[Traefik]
        nginx[NGINX]
        caddy[Caddy]
    end

    sablier([Sablier])

    subgraph providers [Providers]
        direction TB
        docker[Docker]
        swarm[Docker Swarm]
        k8s[Kubernetes]
    end

    traefik --> sablier
    nginx --> sablier
    caddy --> sablier

    sablier --> docker
    sablier --> swarm
    sablier --> k8s

    docker --> containers[Containers]
    swarm --> services[Services]
    k8s --> deployments[Deployments]
Identify your provider
First, identify your provider. The provider is how Sablier talks to your platform. You can see the available providers on the providers page.
Identify your reverse proxy
Next, identify your reverse proxy. The reverse-proxy plugin intercepts incoming requests and calls the Sablier API. You can see the available plugins on the reverse proxies page.
Connect it all together
This tutorial uses the Docker provider and the Caddy reverse proxy plugin. The steps are the same for other combinations; only the provider and plugin configuration change.
Initial setup with Caddy
Start from an ordinary setup, before Sablier is involved. Caddy reverse-proxies requests for /whoami to a whoami service.
services:
  proxy:
    image: caddy:2.8.4
    ports:
      - "8080:80"
    volumes:
      - ./Caddyfile:/etc/caddy/Caddyfile:ro

  whoami:
image: acouvreur/whoami:v1.10.2Run docker compose up and open http://localhost:8080/whoami. The whoami service responds.
Install Sablier with the Docker provider
Add a Sablier container to your docker-compose.yaml. It uses the Docker provider, so it needs access to the Docker socket.
services:
  proxy:
    image: caddy:2.8.4
    restart: unless-stopped
    ports:
      - "8080:80"
    volumes:
      - ./Caddyfile:/etc/caddy/Caddyfile:ro

  whoami:
    image: acouvreur/whoami:v1.10.2
    restart: unless-stopped

  sablier:
    image: sablierapp/sablier:next
    restart: always
    command:
        - start
        - --provider.name=docker
    volumes:
      - '/var/run/docker.sock:/var/run/docker.sock'
Add the Sablier Caddy plugin to Caddy
Caddy does not load plugins at runtime, so you build a Caddy image that includes the Sablier plugin. The plugin repository provides a Dockerfile for this.
docker build https://github.com/sablierapp/sablier-caddy-plugin.git \
  --build-arg=CADDY_VERSION=2.8.4 \
  -t caddy:2.8.4-with-sablier
Then update the proxy service to use the image you built, caddy:2.8.4-with-sablier.
services:
  proxy:
    image: caddy:2.8.4-with-sablier
    restart: unless-stopped
    ports:
      - "8080:80"
    volumes:
      - ./Caddyfile:/etc/caddy/Caddyfile:ro

  whoami:
    image: acouvreur/whoami:v1.10.2
    restart: unless-stopped

  sablier:
    image: sablierapp/sablier:next
    restart: always
    command:
        - start
        - --provider.name=docker
    volumes:
      - '/var/run/docker.sock:/var/run/docker.sock'
Opt your service in with labels
Add the sablier.enable and sablier.group labels to the service you want Sablier to manage. These labels tell Sablier which workload to start on demand, and the group name lets the plugin refer to it.
services:
  proxy:
    image: caddy:2.8.4-with-sablier
    restart: unless-stopped
    ports:
      - "8080:80"
    volumes:
      - ./Caddyfile:/etc/caddy/Caddyfile:ro

  whoami:
    image: acouvreur/whoami:v1.10.2
    restart: unless-stopped
    labels:
      - sablier.enable=true
      - sablier.group=demo

  sablier:
    image: sablierapp/sablier:next
    restart: always
    command:
        - start
        - --provider.name=docker
    volumes:
- '/var/run/docker.sock:/var/run/docker.sock'demo to the service, which is how we identify the workload. See Groups to learn more.Configure the Sablier plugin in your Caddyfile
Now connect the route to Sablier in your Caddyfile. The dynamic block serves a self-refreshing waiting page while the service starts. Here it also selects a built-in theme and shows the instance details on that page.
:80 {
    route /whoami {
        sablier http://sablier:10000 {
            group demo
            session_duration 1m
            dynamic {
                display_name My Whoami Service
                theme ghost
                show_details true
            }
        }

        reverse_proxy whoami:80
    }
}
This configuration applies to requests for http://localhost:8080/whoami:
- Containers labelled
sablier.group=demostart on demand. - After one minute without traffic, the containers stop.
- The dynamic strategy shows a waiting page while the service starts, using the display name
My Whoami Service, the built-inghosttheme, and the instance details.
Sablier ships several built-in themes, including ghost, shuffle, hacker-terminal, matrix, and retro. You can also provide your own. See Customize your theme.
Reach the endpoint and watch it load
Start the whole stack:
docker compose up -d- Open http://localhost:8080/whoami. The
whoamicontainer is running, so Sablier passes the request through and you see the service. - Leave the page idle for one minute. Because
session_durationis1m, Sablier stopswhoamionce no traffic arrives. Confirm this withdocker compose ps, wherewhoamino longer appears. - Refresh http://localhost:8080/whoami. The container is stopped, so the Caddy plugin passes the request to Sablier. Sablier starts
whoamiagain and serves the waiting page while it starts:
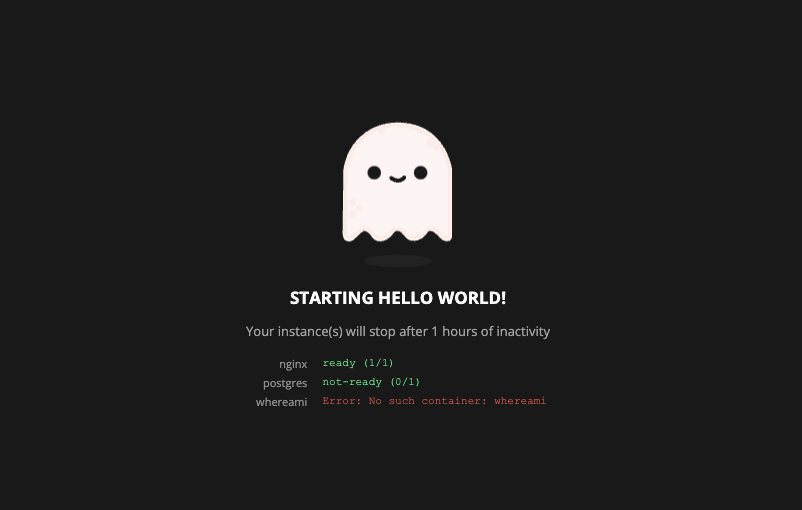
The waiting page refreshes on its own. When whoami reports ready, Sablier reloads the page into the running service, with no action needed from you.
You have now followed a request through the full path: a stopped service, a waiting page, and the running application. This is scale-to-zero from end to end.
dynamic block with a blocking block. To start instances without waiting at all, use a poke block. See Loading strategies for all three.